‘Rapid-Prototying - SRP or ARP?’

Around twelve years ago, lasers started to appear in D&T departments and few could have predicted the impact they would have.
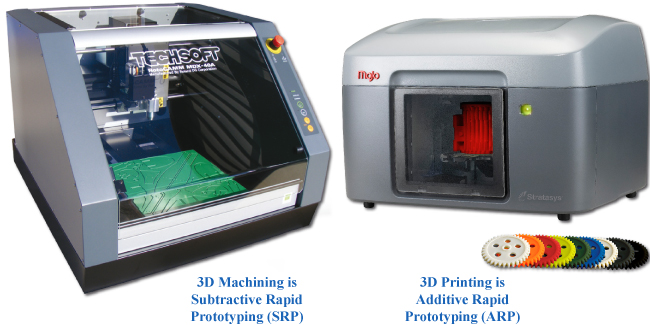
For many schools, lasers are simply The Way that CAD/CAM gets done. There are plenty of practical reasons why this is the case, but lasers are not the only CAM tool that students need to know about. In my last article, I wrote about the excellent opportunities afforded by CNC knife-cutting. This month I thought CNC milling deserves some attention too. 3D Machining as part of an iterative design process is (of course) Subtractive Rapid Prototyping (SRP). 3D Printing is Additive Rapid Prototyping (ARP).
Unique Capabilities
There are many jobs that CNC milling machines are uniquely able to do. They will work a broad range of materials and they do represent an extremely important production technique. While lasers are (almost by definition) 2D machines, CNC milling gives precise control over at least three axes so machining accurate pockets and housings is assured. This 3D capability also means that full 3D forms can be machined from inexpensive blocks of material. Again, this is an important production technique and provides an alternative to 3D Printing when particular design needs have to be met.
Horses for Courses?
A couple of good examples came my way in recent weeks. The first was from a major architectural company who needed to produce 1:500 scale models. With a strong reputation for sculptural, organic-forms, models had to use 3D techniques. 3D Printing delivered models very easily but, for their needs, the textured surfaces needed finishing. They wanted completely smooth surfaces straight away, but couldn’t justify the budget for a more advanced Dimension Elite or Objet system. The answer was found by 3D machining using a TechSoft/Roland RotoCAMM MDX-40AE and the Visual Toolpath software supplied free with most TechSoft 3D capable machines.
The second example was supplied by an ex-teaching friend who needed a military cap badge reproduced to form part of a memorial piece. Over a wet weekend, I scanned the original cap badge using the simple and inexpensive contact-scanning accessory for the MDX-40AE. I wanted to capture all the fine details so set a 0.1mm pitch and left it scanning overnight. I then used our Mojo 3D printer to print out a full-sized copy, dead easy - just a couple of clicks. The result was good but like all FDM (Fused Deposition Modelling) 3D printers, final resolution is governed by the filament thickness, so surface details were ‘smoothed over’. Using the MDX-40AE, Visual Toolpath and a fine engraving tool, I was able to achieve excellent detail and something suitable for a mould, former or the finished item itself.

It's All Good!
3D Printing is a superb tool and needs to be part of every student’s design education but, like lasers, they find their place alongside (not instead of) milling technology.
At TechSoft we know about this and supply high quality technology for both types of production. Which is best? That depends on what you are doing.
by Tim Elderton of TechSoft, May 2014


