Step 1 of 4: Using the Network Setup Program
- Download the Network Installation zip file from our website. You will need to download this through the resources area of our website under your school/companies account.
- Save the zip file to a location where you have full administrative access.
- Unzip the package. (Right Click on the .zip file then choose Extract All). Once unzipped, the contents of this are as below:

- Double click on “Network Setup.exe”. (This program does not get installed, it is just a standalone program to prepare your distribution and licence files).
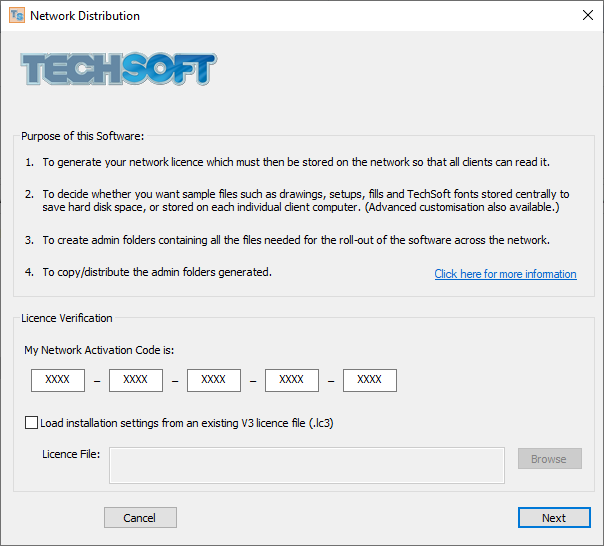
- Enter your Network Activation Code which you can find through the resources area of our website under your school/companies account. Please contact us if you cannot find this. Once entered, click Next.
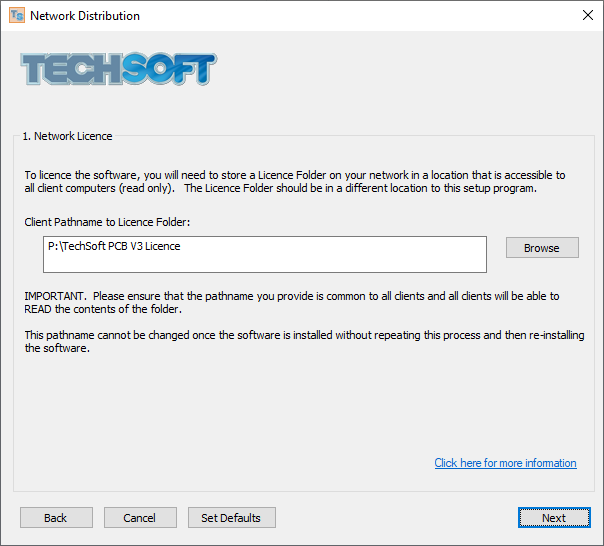
- You need to manually create a folder on your network which is accessible to all of your computers. This folder needs to have read access from the computers. Typical examples are:
\\MYSERVERCOMPUTER\TechSoftPCBV3LicenceFolder
P:\TechSoftPCBV3LicenceFolder
You need to enter the pathname in here exactly as the client computers will try to use. Once done, click Next.
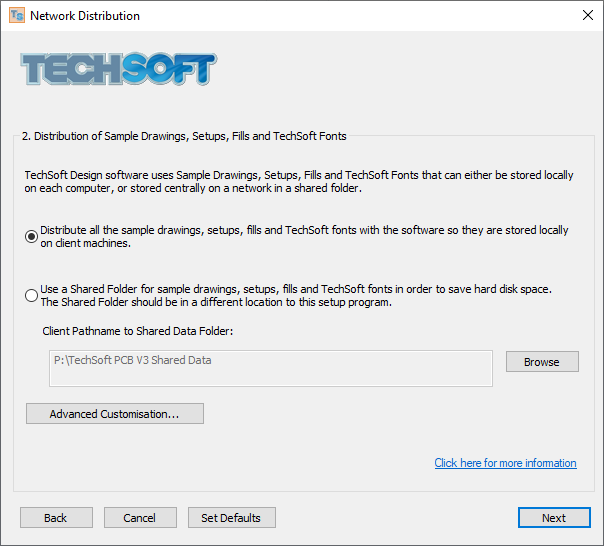
- You then get to choose whether you want to use a shared data folder to share common data files like sample files, or to simply distribute the data to all computers. The default is to all computers. Once done, click Next.
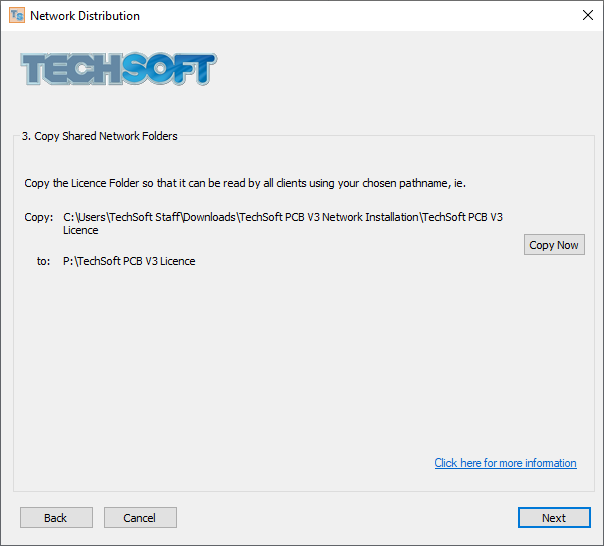
- It will then tell you to copy the contents of the licence folder to the location you set earlier, click Copy Now and then click Next. This copies a licence file is called “tspcb3V.lc3” to the intended location. (If you choose to share the data it will tell you where to copy this to as well).
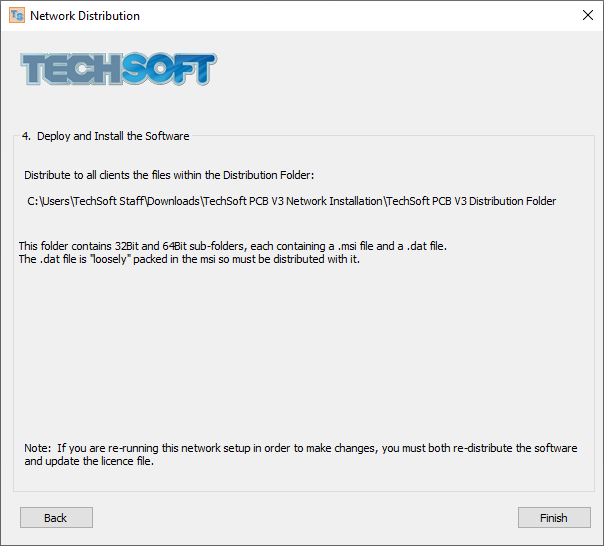
- Finally it will tell you to deploy and install the software.
The program will have created an .msi file and a file called “tsd.dat” in the Distribution Folder - in fact the distribution folder contains both 32-Bit and 64-Bit sub-folders, each containing a .msi file and a .dat file. The 64-bit version is preferred as long as your computers are 64-bit.
Step 2 of 4: How to install from the MSI
If you are unfamiliar with MSI installations, you can simply copy the .msi file and corresponding “tsd.dat” onto your computer making sure that the “tsd.dat” file is next to the .msi file in a folder. Then double click on the .msi file and follow the prompts to install the software.
If you are familiar with MSI installations, then you can install the software using the command prompt or whatever software you are using, for example SCCM. You need to make sure that the “tsd.dat” file is next to the .msi file when it is packaged. The .dat file is “loosely” packed in the .msi so must be distributed with it. There are no special MSI parameters for the software and so an example command line installation would be:
General Form:
msiexec.exe /i "\x64_TechSoft_PCB_V3_Network.msi" /quiet /qn /norestart
Example:
msiexec.exe /i "C:\LocationOfFiles\x64_TechSoft_PCB_V3_Network.msi" /quiet /qn /norestart Note that the installation requires Administrative Privileges.
Installing on an RM SystemIf you are installing on an RM system, please see our
notes for RM installations.
Step 3 of 4: Installing on a Test Computer and Checking Everything Is Setup Correctly
We recommend installing the software on a test computer first. Once installed:
- On the test computer, log in as a user. Open the software and check that no errors appear. Click on the Fill… button. Click on the Load Fill button. The dialog box should show all the files within the folder TechSoft PCB V3 Data\Fills. If it does not then you need to re-run the Network Setup package (see also Changing the Initial Folders below).
Select Texture then click on the Load Texture button. The dialog box should show all the files within the directory TechSoft PCB V3 Data\Textures. If it does not then you need to go back and re-run Network Setup.exe (see also Changing the Initial Folders below). Click Cancel, then Cancel again.
Choose the “ABC” text icon in the left-hand toolbox then click anywhere in the drawing area. Click on the Settings… button. Select TechSoft Font. All the TechSoft fonts within the directory TechSoft PCB V3 Data\TSFonts should be accessible. If they are not then you need to go back and re-run the Network Setup.exe (see also Managing TechSoft Fonts below). Click Cancel, then Cancel again. Close the software.
- Assuming all is O.K. the package can then be rolled-out to all the computers required.
ADVANCED CUSTOMISATION OF PATHNAMESChanging the Initial FoldersWhen TechSoft PCB V3 is run, and
File > Open or
File > Save are chosen for the first time, the dialog box must open showing all files in a particular folder. This folder is the “initial drawings folder”. Similarly
Setup > Load Setup and
Setup > Save Setup use the “initial setups folder”. The default setup (the one that is loaded as the program starts) is called default.cf3, and saved in the “default setup folder”. From the
Fill Settings dialog box, the “initial fills folder” is used when clicking on
Load Fill or
Save Fill; the “initial textures folder” is used when clicking on
Load Texture; and the “initial patterns folder” is used when clicking on
Load Pattern.
It is possible to customise the initial drawings folder, the initial setups folder, the default setup folder, the initial fills folder, the initial textures folder and the initial patterns folder by adapting the pathnames in the
Network Setup.exe program.
Managing TechSoft FontsTechSoft fonts (as opposed to Outline fonts) can be stored in a “common” (or “shared”) folder and/or a “user” folder. The “common” folder must be accessible to all users across the network, but the “user” folder is for the use of an individual user. (On a standalone machine both folders are normally the same.) When the
Open Font dialog box or the
Text Settings dialog box is opened, the software will look in both folders and list the TechSoft fonts from both. (If the same font name is found in both folders it will be listed twice, the font from the “shared” folder being appended with the word “(Shared)”.)
It is possible to customise the “common” and “user” font folders by adapting the pathnames in the
Network Setup.exe program.
Step 4 of 4: In two year's time
The licence file, “tspcb3V.lc3”,expires either at the end of your subscription or after 2 years, at which point it needs to be updated by running the “Network Licence Updater.exe” program which is also included in the download. With this program you simply browse to the existing licence file and it then outputs out a new file to replace it with. We will send you an email reminder when you need to do this.
In this section of our website you will find basic support articles for a range of TechSoft's software and machines. If you cannot find what you are looking for, please contact us on 01745 535007 or email us on sales@techsoft.co.uk


