About Smells
Laser cutting by it's very nature will cause smells, some of which can be unpleasant. As long as the extraction system is working and the air is being extracted through the system, the smell is not a safety concern.
This article lists things you can do if you think the smell is too unpleasant.
The first section below contains issues which can result in smells which could be a concern to safety. The second section further down the page contains advice for removing unpleasant smells that are less likely to be a safety concern.
Safety Concerns:
This section lists issues that are a safety concern and should be resolved as soon as possible.
1. Make sure the Filters are Inserted Correctly
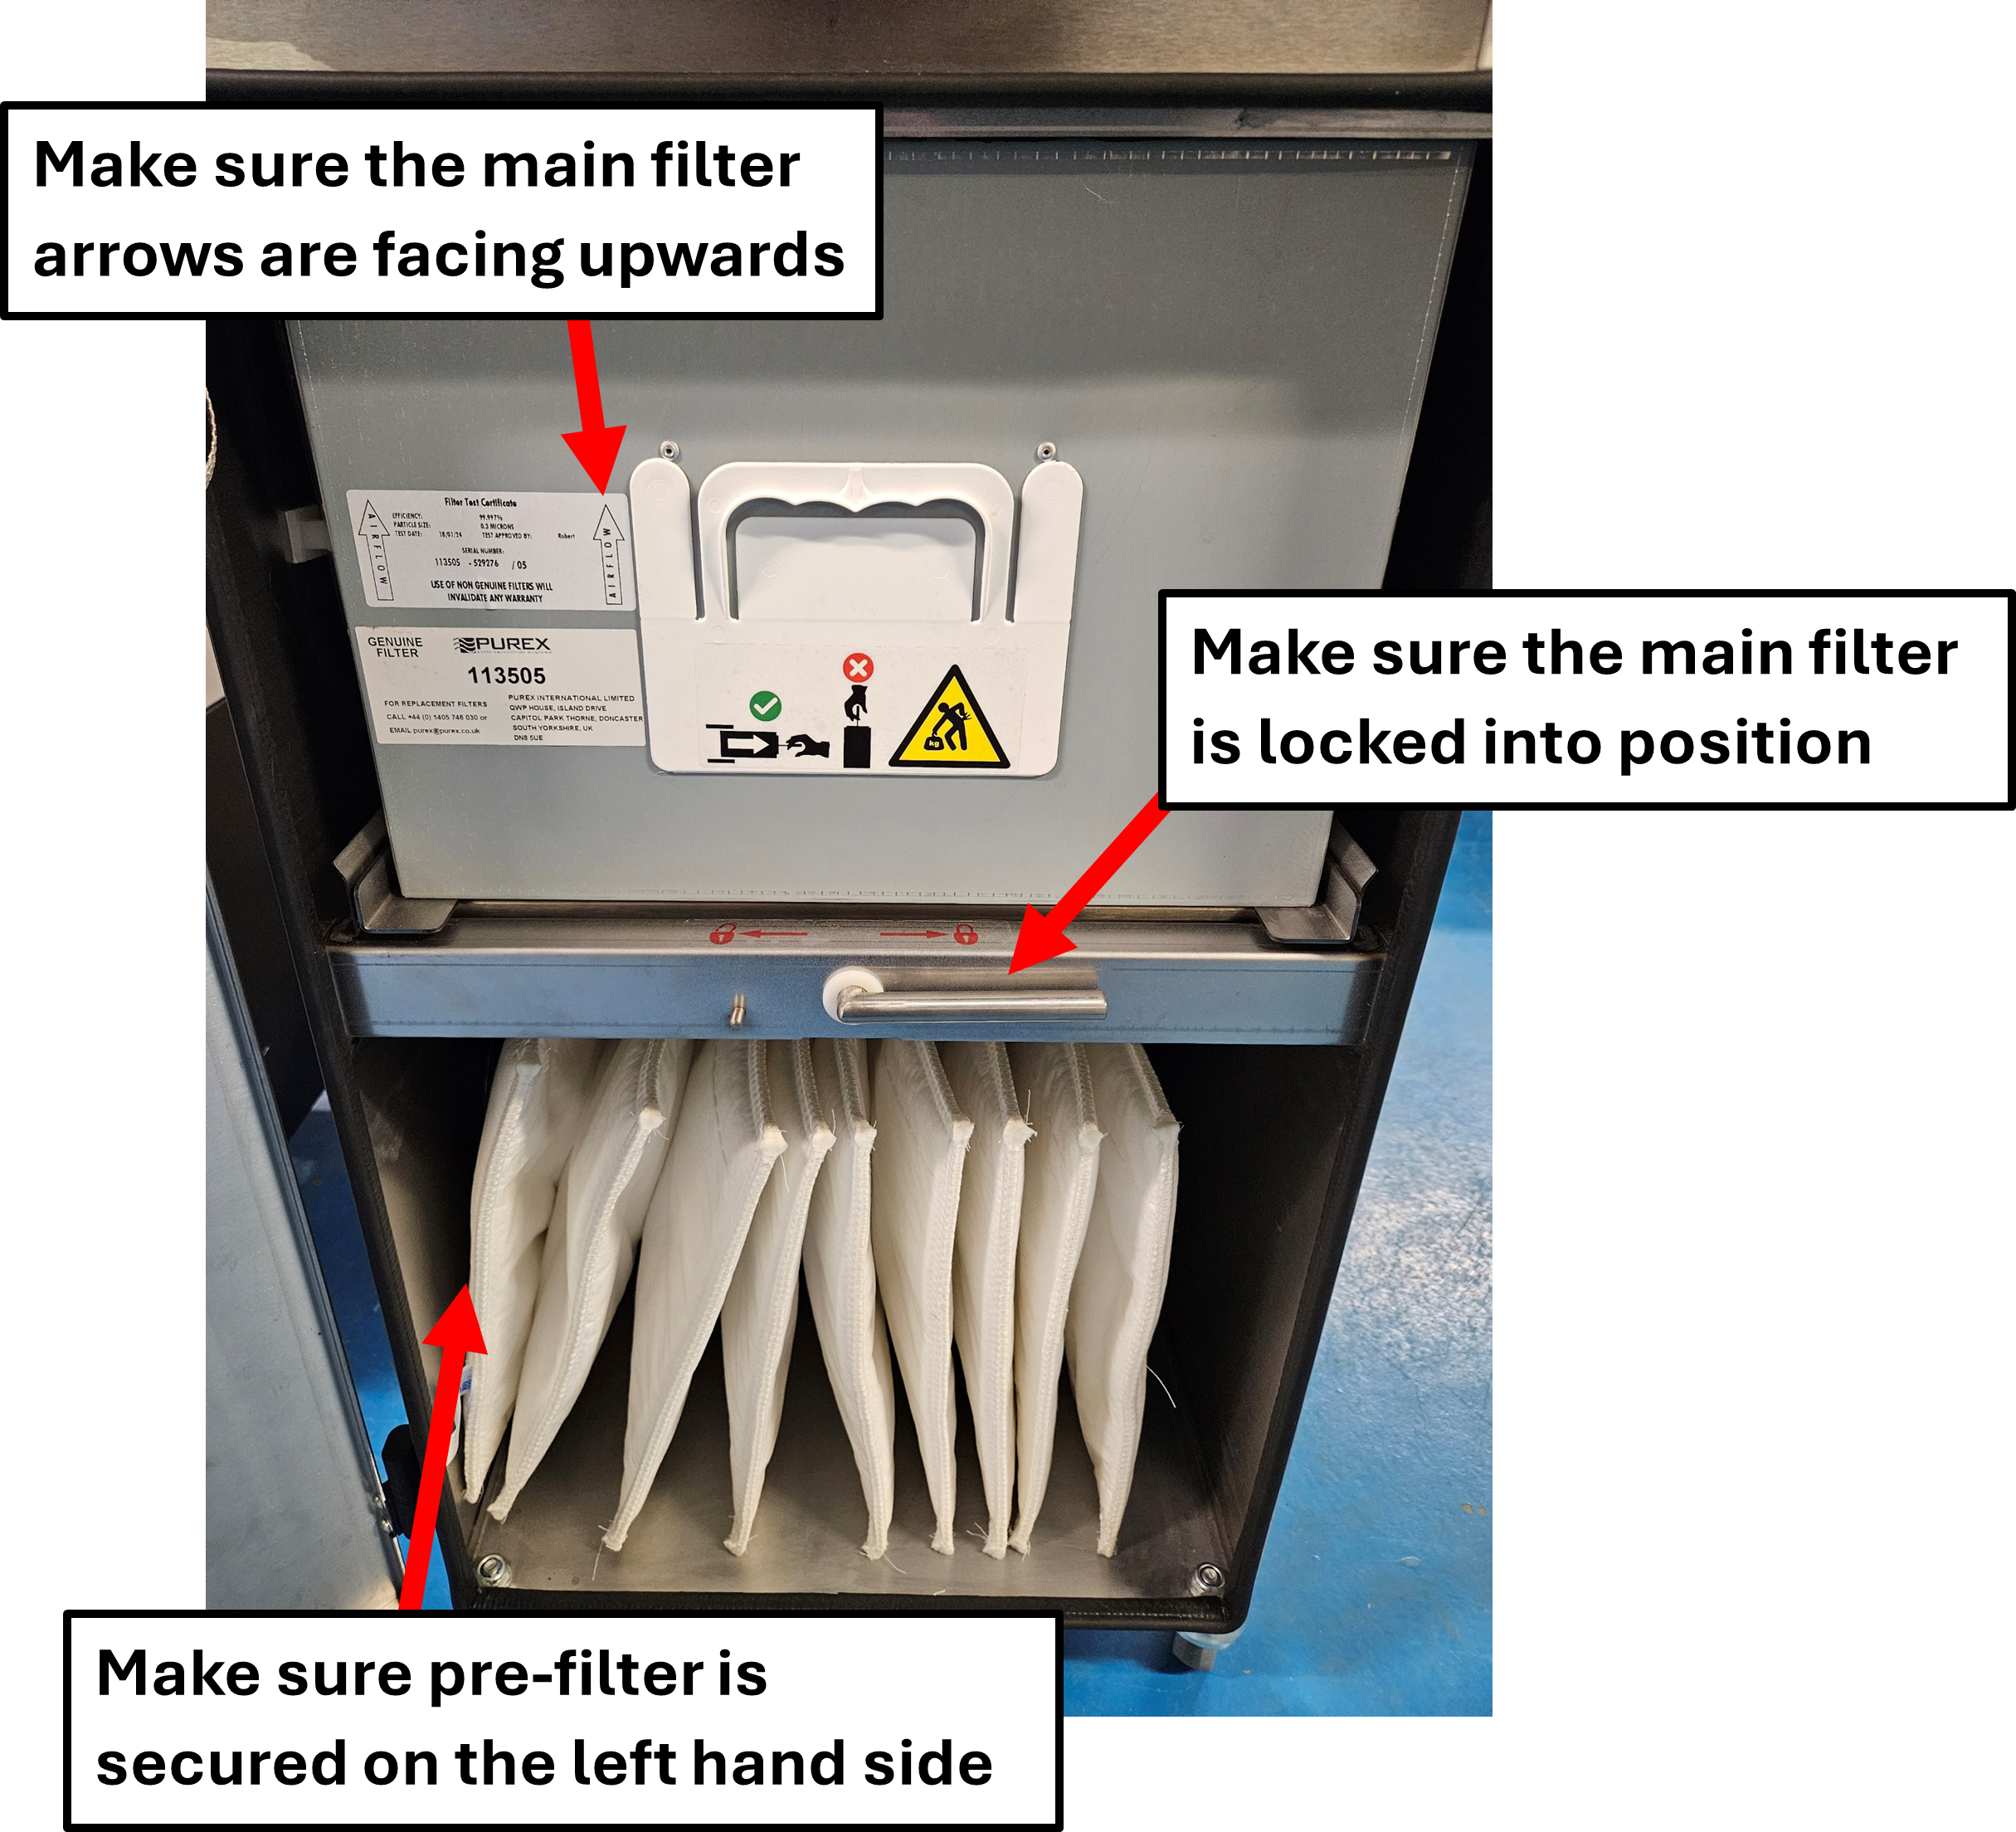
Open the front panel of your extraction unit. Make sure the filters are inserted as per the instructions in the image below.
 For LaserCAM Star A3+ only: The filter configuration is different, and the arrows on the main filter should point downwards.
2. Check that the Extraction Hoses are the right way round
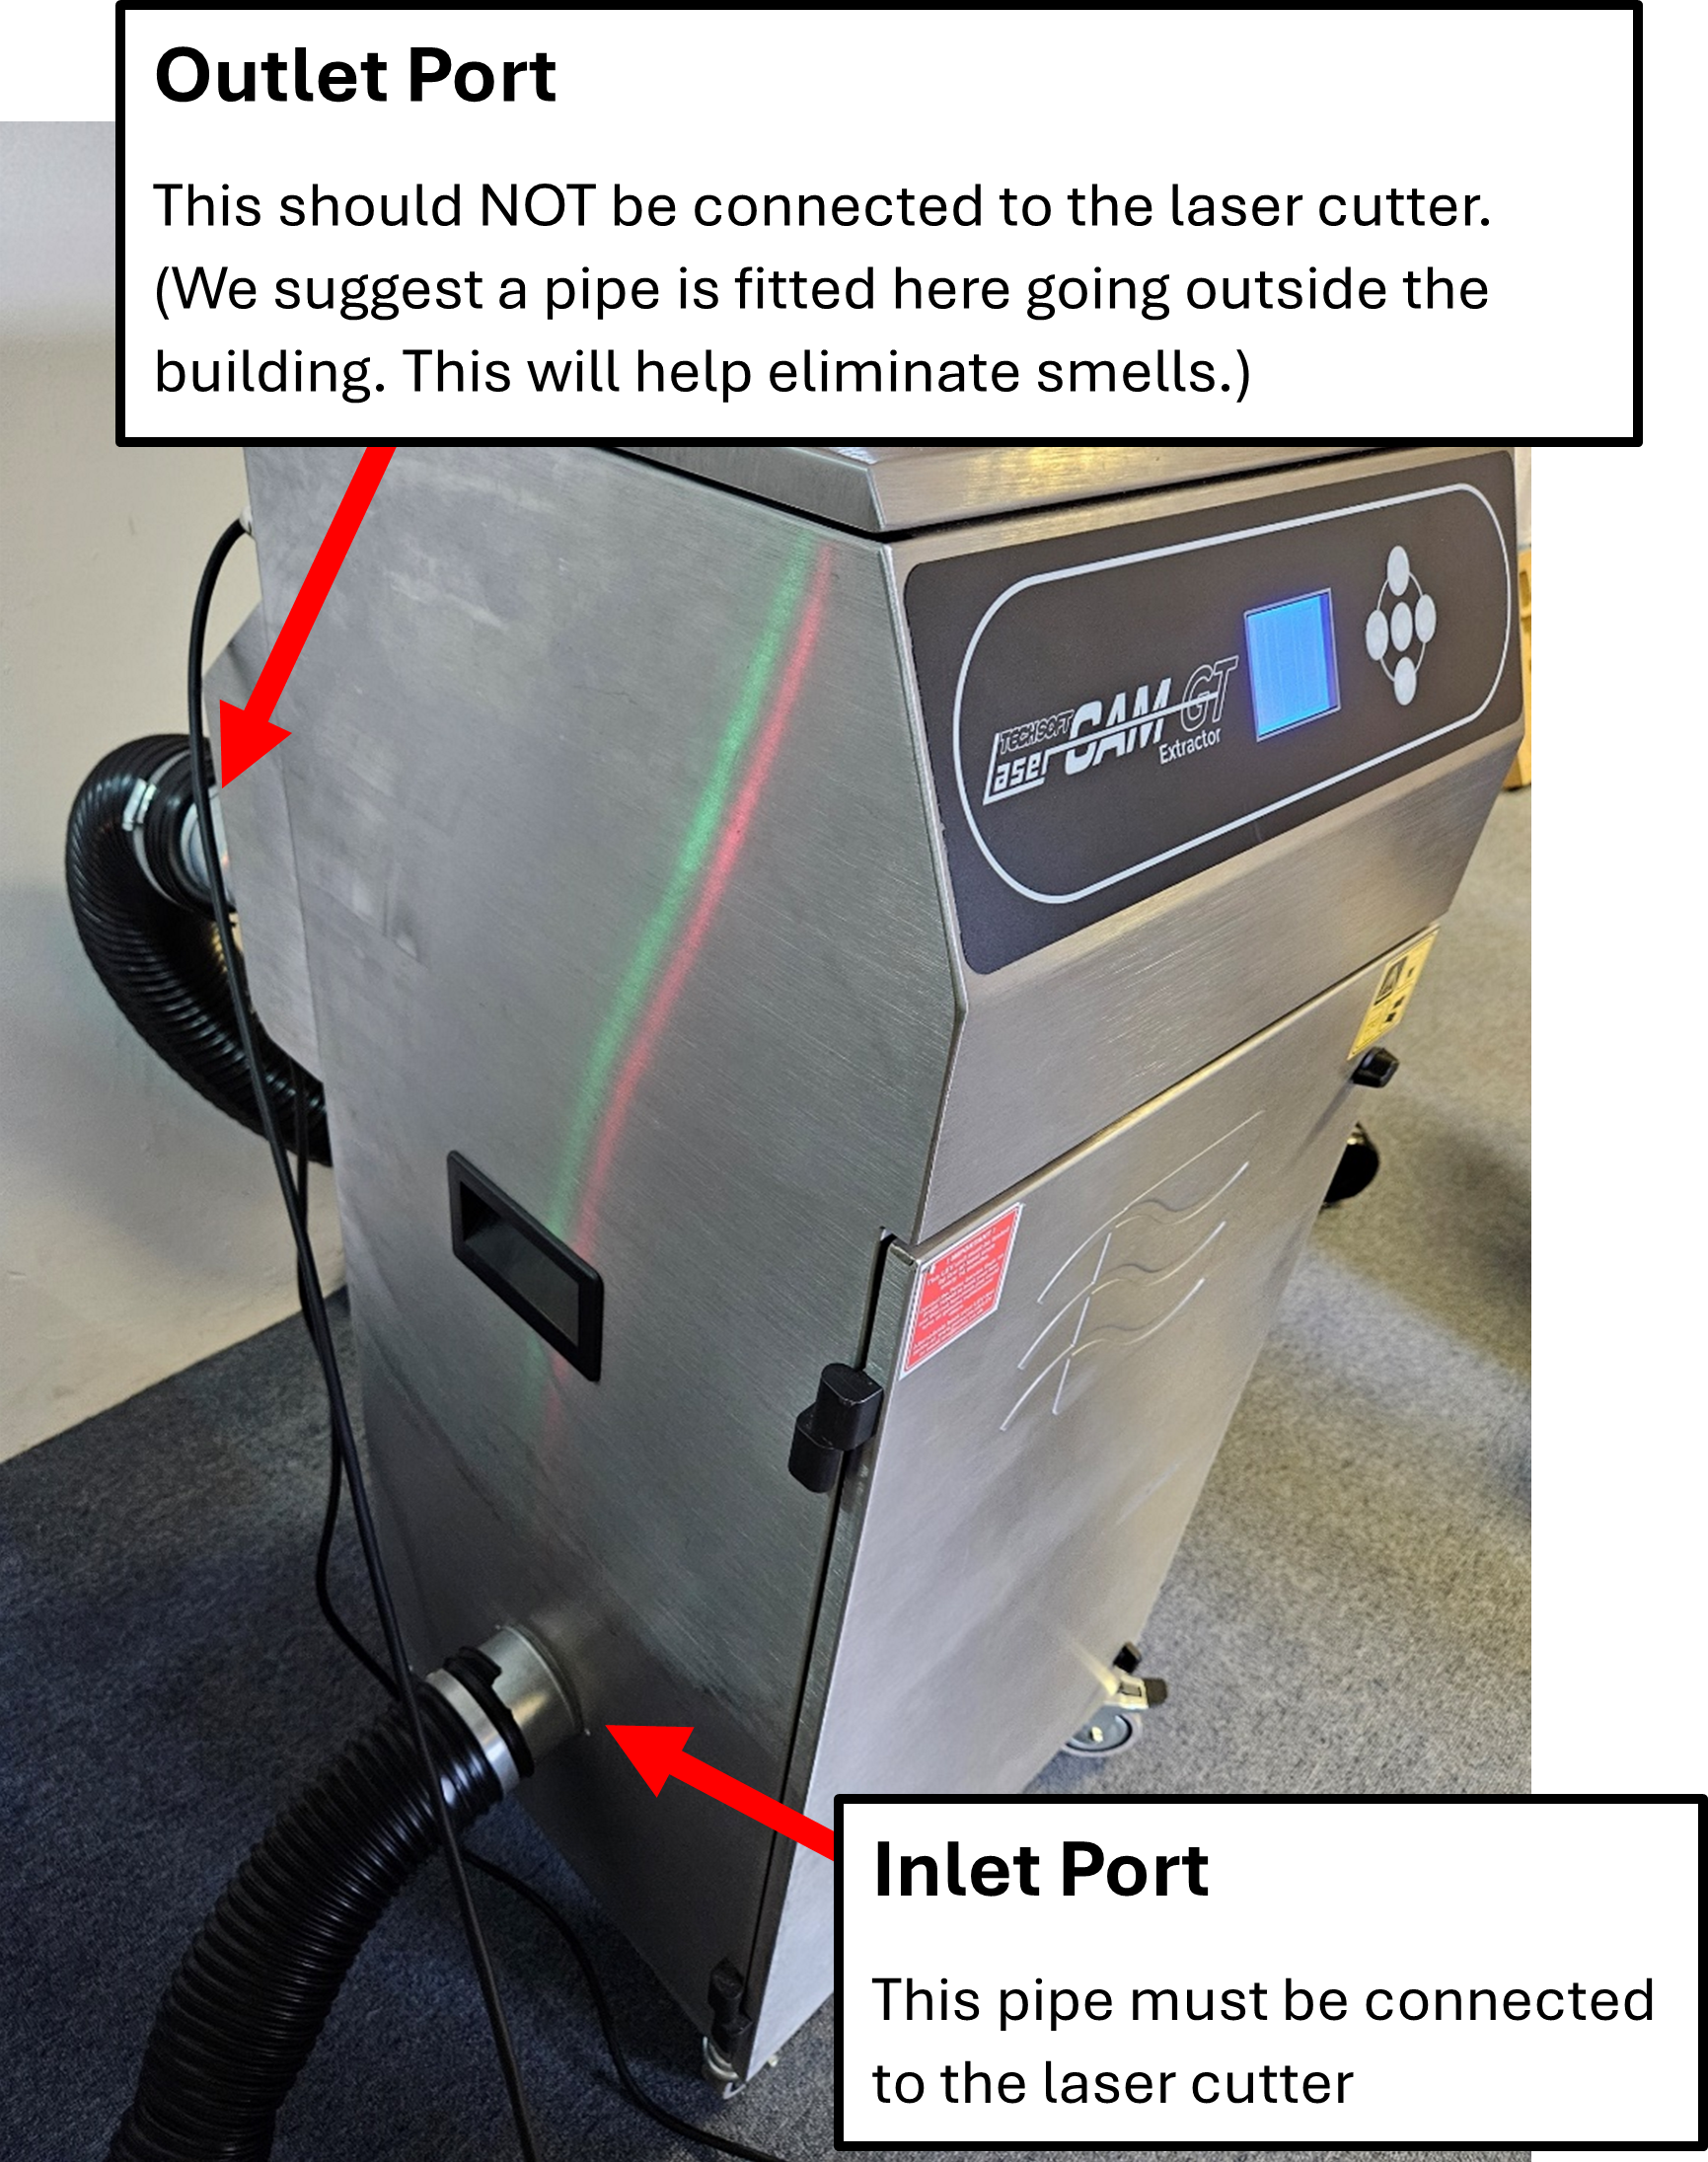
This is very important that the hoses are connected into the extractor the correct way round. Please check where the hoses go to. If they are the wrong way round, they should be swapped immediately.

3. Warnings on the Extractor
If either of the following situations is happening, this normally indicates that the filters need to be changed.
- Is the extractor flashing red, or is beeping?
- Are any of the columns filling up?
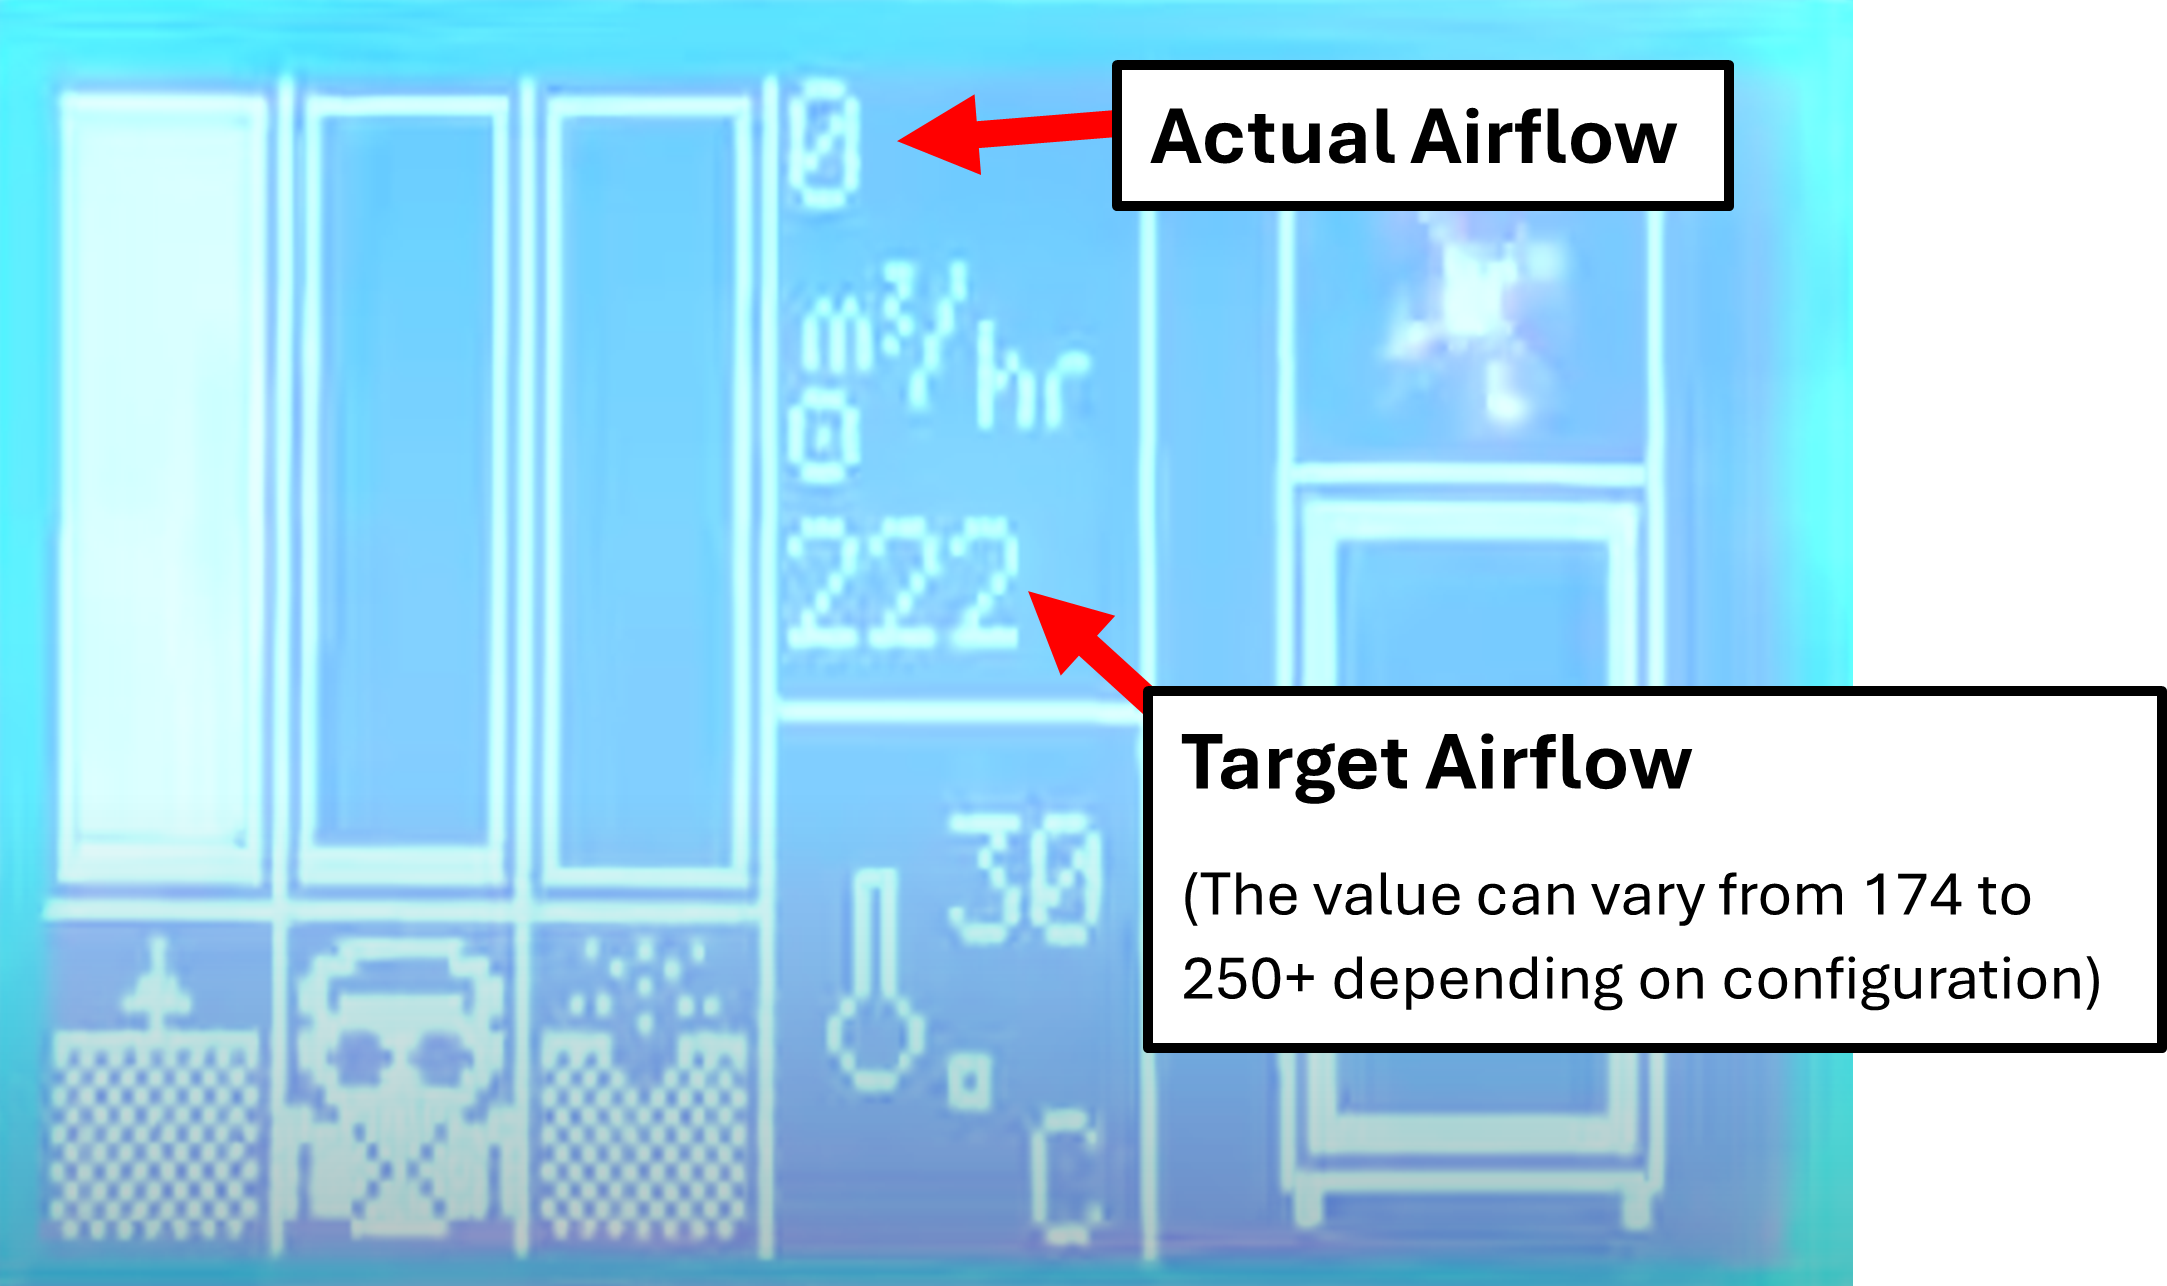
- Do you see that the actual airflow is struggling to reach the target airflow.

4. Check the condition of the pipework, and whether there are any holes or tears.
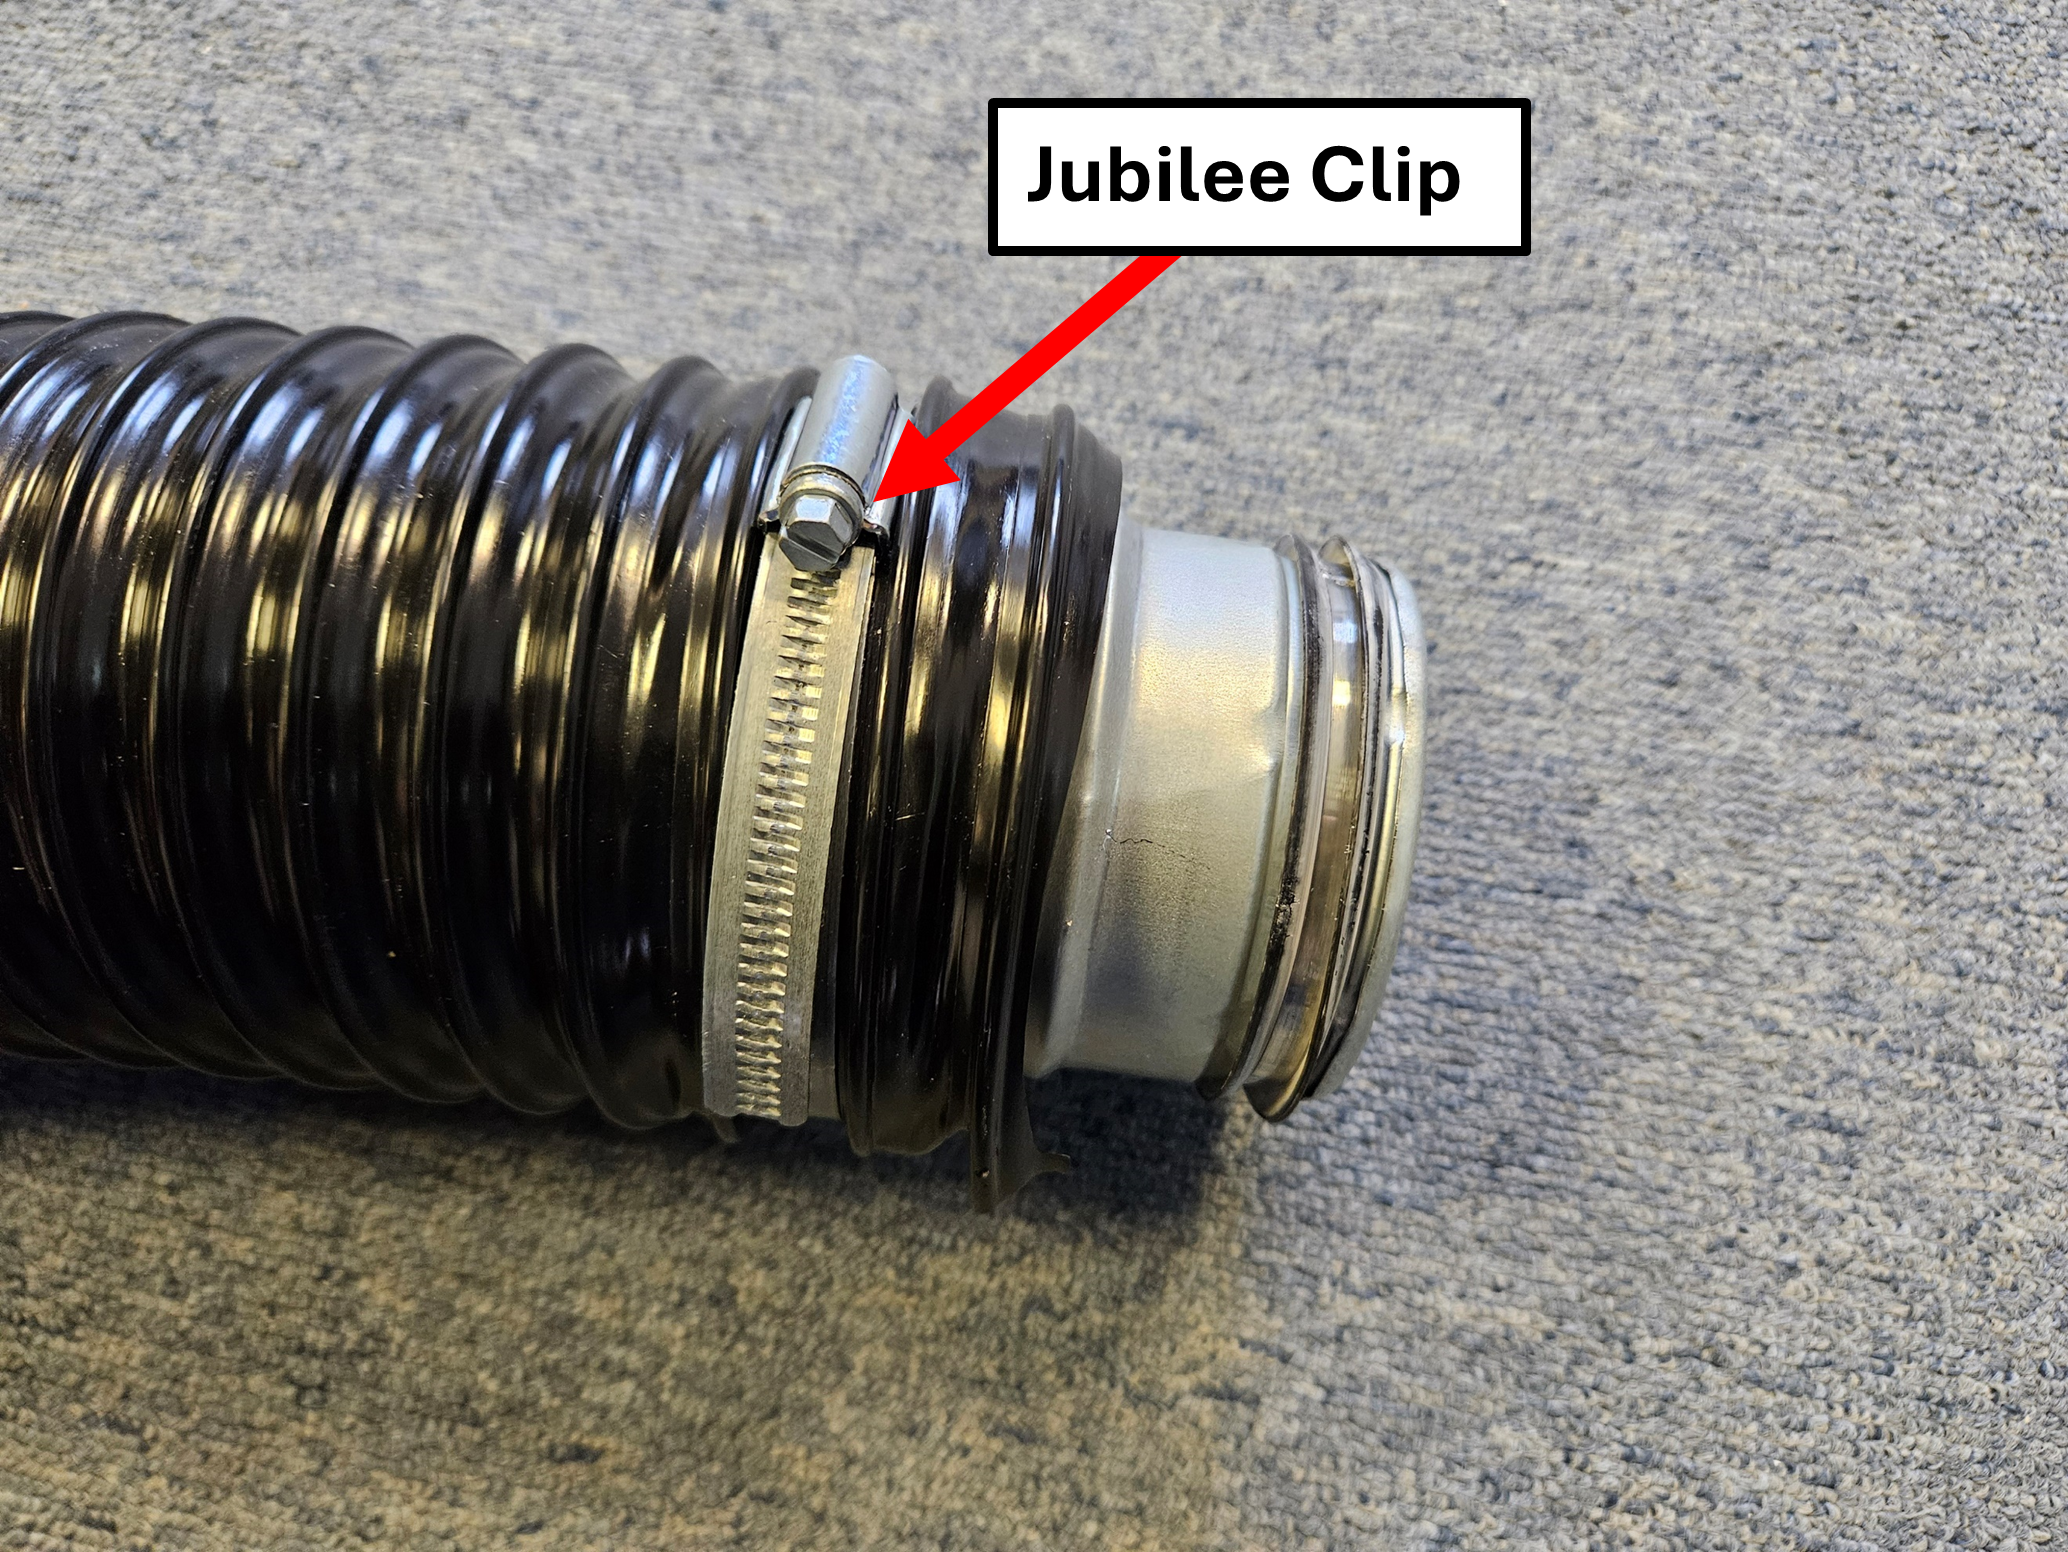
Your pipework will mainly consist of black hoses connected onto metal connectors. The hoses are held secure onto the metal connectors by metal jubilee clips (metal rings).
Make sure that all of these connections are tight. If needed, the jubilee clips can be tightened with a flat head screwdriver.

Check the hoses for any tears, or the connectors for any holes. Where possible, cover any issues with duct tape. If this is not possible, the hose or connectors should be replaced.
5. Make Sure the Extractor Is Run for Long Enough
Make sure the extractor is running for at least 60 seconds after cutting.
If cutting a particularly smokey or smelly material, the extractor can be turned on manually to run for longer. If you can still see smoke in the chamber after the extractor has stopped, you must turn the extractor back on until all smoke clears. If there is still smoke after 60-120 seconds, this could indicate a blockage in the system (check pipes and airflow paths are clear), or low suction from the extractor due to saturated filters (the filters would need replacing).
Be mindful of fumes which can become trapped within the honeycomb bed underneath the material which will be released when the material is moved. You can often move the material slightly with the extractor still on to remove these.
(Note also that if there is no other apparent cause for lingering smoke in the chamber, the extractor can be altered to run for a longer time after cutting and/or to be set for a higher air flow rate. This can be requested during a service visit by our engineers.)
6. Check the Materials you are Cutting
Certain materials are smellier than others.
Standard plywood from a hardware store can cause horrendous smoke and smells, and is not safe for laser cutting. Laser grade plywood must be used when cutting with a laser cutter.
Try cutting a completely different material. Does the smell still persist with another material? If not, you could look to change where you buy your material.
Lingering Smells:
If there are no issues from the section above, it is more likely that you only have unpleasant smells rather than a safety issue. This section deals with ways to reduce these smells.
7. Replace the Filters
The number one cause of extractor smell is a build up of bad residue in the filters. This can happen even if the filters are not "full" and there are no warnings on the unit.
You should first replace the pre-filter (the white fabric bag).
If the smell persists, replace the main filter (the metal box).
In general school use we recommend the pre-filter to be replaced every 6 months, and the main filter to be replaced every 12 months. However this is only a guide. If you are using the machine heavily, you may need to be replacing the filters much more often than this (as often as every few weeks in cases where the machine is used every minute of the day). A good comparison would be with a hoover/vacuum bag where the more you use it, the fuller it gets, regardless of time.
8. Extract Externally
The air coming out of the extraction system can contain smells even in the best situations. As a long term solution, you should exhaust the air from the extractor outside the building (connect a hose pipe to the top outlet port on the extractor, and have the other end go out of the building, normally by drilling a hole in the wall).
If you are venting externally, be mindful of fumes returning into the room through the exhaust vent or window. Make sure to seal any exhaust vents if possible and exhaust vents may also need cleaning occasionally.
In situations where venting externally is not practicable, the machine should be situated in a well ventilated room or in a storage or prep room away from the classroom.
9. Check Your Power and Speed Settings
Check your power and speed settings. If these are not optimal for the material being cut and for your specific laser cutter then you could be creating more fumes than necessary. Ensuring the lens and mirrors are clean and in good condition along with properly autofocusing and a well aligned machine would also help to ensure the best and cleanest cut possible. This is a good reason to keep on top of machine maintenance and to have the machine serviced regularly by a TechSoft engineer.
10. Clean the Laser Cutter
Clean the machines cabinet along with any extraction vents and ports on the machine to remove as much soot and residue as possible.
In particular, don't forget to remove the honeycomb bed and clean thoroughly underneath this.
If the honeycomb bed itself is heavily soiled and well worn then it should be replaced as smells can linger from it. Even if you cannot smell anything bad on the honeycomb when cold, the heat generated during laser cutting can induce smells.
Please note that whilst lack of cleaning of the laser cutter may not be a safety concern regarding smells, this does not mean it is not a safety concern. Lack of cleaning is a very serious, as it considerably increases the fire risk of a machine. The laser beam can cut through your material and the beam will continue into the honeycomb and onto the area below the honeycomb. If debris/residue is not cleaned out of these places, the beam can set fire to the debris/residue. The machine should be regularly cleaned to reduce this fire risk.
11. Run Clean Air Through the Extractor
Remove both filters from the extractor. Remove the inlet and outlet pipes from the extractor. Manually turn the extractor on and allow it to run for 30 minutes. This will help clear any lingering smells if they persist from the extractor.
In this section of our website you will find basic support articles for a range of TechSoft's software and machines. If you cannot find what you are looking for, please contact us on 01745 535007 or email us on sales@techsoft.co.uk


