Pre-Set and Save Settings with TechSoft Design V3
Issue
You are using TechSoft Design V3 with your LaserCAM GT.
You want to do one of the following:
- Pre-set certain colours for different operations, such as setting Black to Engrave and Red to Cut.
- Pre-set specific power and speed settings for a certain material.
This is a very common situation.
Solution
The best way to do this is to:
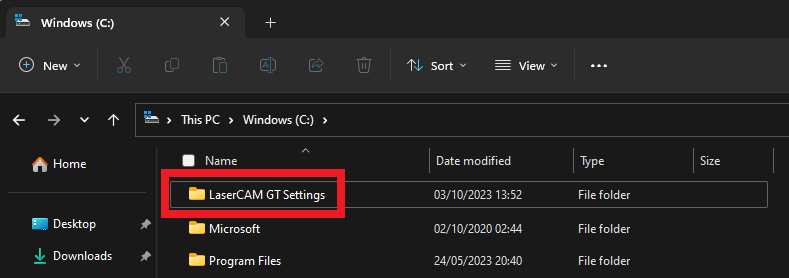
- Create a folder on your computer, or on your network, where you can save "pre-set" files to.
- Open TechSoft Design V3.
- In TechSoft Design V3, on the top bar, select "Setup" > "Customise" > "Pathnames…".
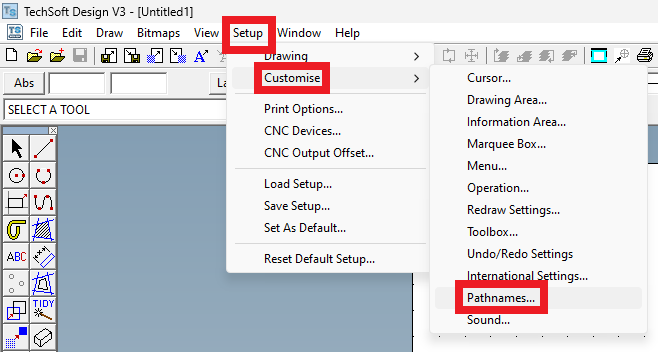
This will open the "Pathnames" dialog box.
- Change the "Load Setups" and "Save Setups" pathnames here, to be the folder you created in Step 1.
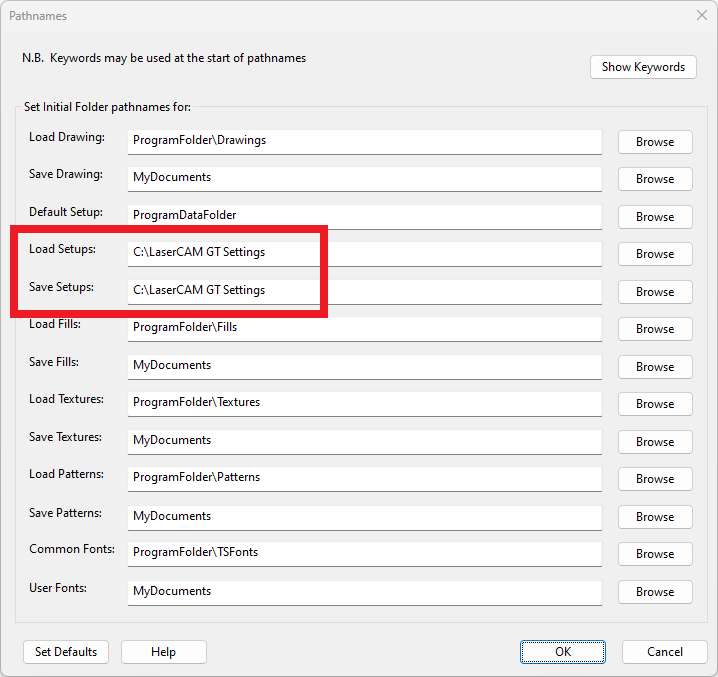
- Click "OK" to get out of the dialog box.
- On the top bar, select "Setup" > "Set As Default…". Tick "Pathnames" and click "OK".
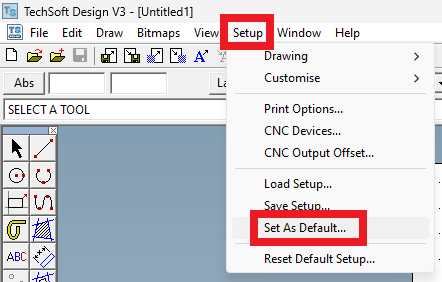
Note: If you did not do this step, the pathnames would reset when you restart the program.
- Go to "Setup" > "Drawing" > "Layout".
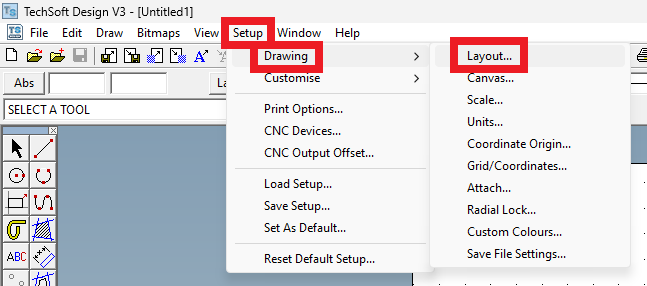
- Click on "Set for CNC device" and select the LaserCAM GT.
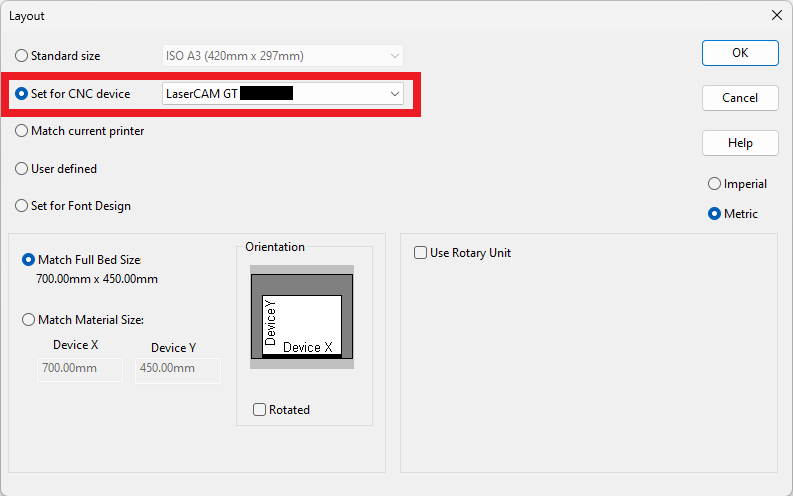
- Click "OK" to get out of the dialog box.
- Optional: If you only use this computer for the LaserCAM GT and you want the software to be set to the LaserCAM GT when you make a new file, you can go to the top bar, select "Setup" > "Set As Default…". Make sure that "Layout" and "Pathnames" are ticked and click "OK".
- Click on the icon highlighted in red below (or go to "File" > "CNC Output").

- Make sure that the LaserCAM GT is selected, and then go to "Output Setup…".
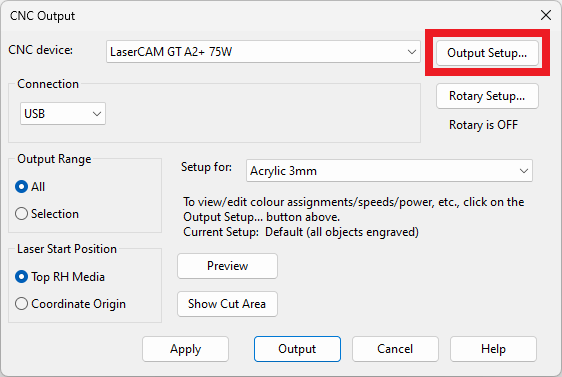
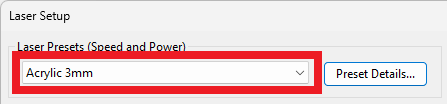
- On the "Laser Presets" dropdown, select the material you are outputting to, or the closest material from the list (you can create a new material in this list, but this requires further saving/loading).
- Change the settings on this page to be exactly as you want.
You can add colours to the Vector Line and Solid Fill Settings by clicking the respective "Add…" buttons – at this point, you can change the Mode to Cut or Engrave, and also manually adjust the power and speed as required.
The best way to know what values work best for your machine are simply to try outputting on your material.
Once you are happy with these settings, click on "Save…" on this page. Because you set the pathnames earlier, this should open in the folder you made in step 1.
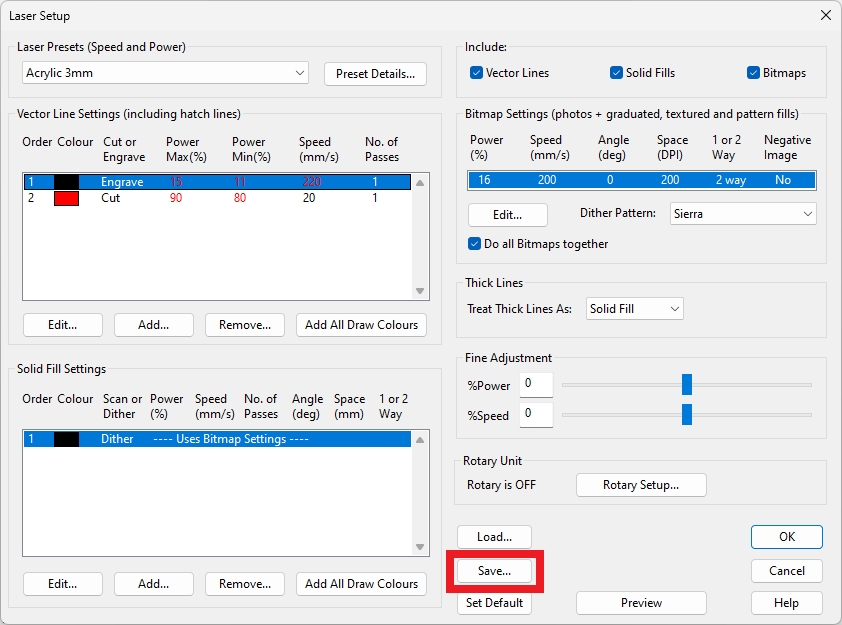
- Save the file with whatever name you would like, for example something like "acrylic 3mm normal settings".
Now you are setup. Each time you do a new drawing or load a drawing, and are ready to output with your chosen settings, you just need to do the following:
- Go to "File" > "CNC Output", click on "Output Setup…", click “Load…", and select the file you saved.
This will bring in the exact setting you saved. If you are happy, click "OK" to close the menu, and then you are ready to output.
Article Date: 03/10/2023
In this section of our website you will find basic support articles for a range of TechSoft's software and machines. If you cannot find what you are looking for, please contact us on 01745 535007 or email us on sales@techsoft.co.uk


")


